
Castle Neverwinter
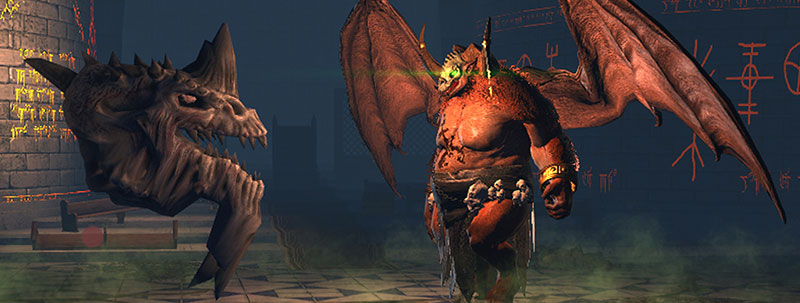
Tal’Gath the Undying
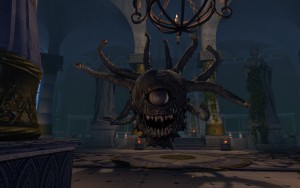
The big head known from the original version of Castle Never is the first and most basic boss of the dungeon. It’s pretty much only a big AoE dodge party in which you need to pay attention to three attacks. The first one is a hard-hitting AoE line that splits the room from east to west and needs to be avoided. The other two are from the boss, who can disable players with a roar and kill everyone but a tank with his AoE circles. These circles also apply a debuff to anyone standing in it even if the target does not take an damage. Because of this you should avoid dodging into the area as DPS. The debuff plays a role in the boss’ third attack, which is a laser that does ~20k damage sporadically, but several 100k if debuffed.
Overall I like that the devs continued their approach to train certain mechanics of the last boss in easier content. In Underdark they have done it with the skirmishes, which included the mechanics used in Demogorgon, and in Castle Never you’ll meet most of the boss mechanics of Orcus along the way as well. The one introduced in the Tal’Gath fight is linking/bonding two players that are slowly dragged towards each other for several seconds. If they touch they get thrown in the air and take a significant amount of damage. Affected players should move into opposite direction and avoid contact. The party should also spread properly to be able to react fast enough.
Cthylarr the Illithilich
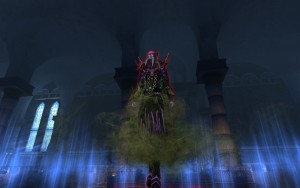
The second boss mainly requires the correct moving pattern from the group. In the cutscene the camera pans to the ceiling and reveals spikes. The room inverts every so often and in case players were standing beneath the spikes, they fall into them. They hit hard and disable characters, making you an easy target for the otherwise not very challenging adds. Those spawn directly next to the player holding the aggro though whenever the room flips, so be prepared to block or dodge.
The spike pattern changes with every room change, so make sure to check the ceiling and position yourself correctly.
With these tip and hints, you should have no problem with the first two bosses of Castle Never and next time we’ll be dealing with Orcus! Make sure to add your own remarks in the comments below or in the corresponding forum thread. Used pictures taken from this blog and I’d also like to thank Sharpedge for contributing to this guide.
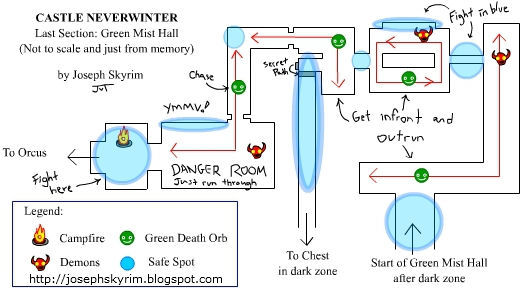
Hall of dying
You need to navigate through a dark maze of rooms with dead sleeping people and green balls of death.
For the dead ppl. stay on the side of the room. And don't run into the green balls. Follow the route below.
Orcus
Entering the fight the first thing you need to know is that the cutscene can be canceled. We generally learned to hate the unnecessary wait before bosses if you’re doing them for the gazllionth time, but enforcing them at least guarantees that the group will start the fight together. At Orcus it can happen that the DPS start to rush into the boss without their healer or tank, which are still looking at the cutscene. So it’s generally recommended to wait at the spawn point until everybody is ready.
Basic Attacks
Orcus has three major attacks and all of them are deadly to anyone not the tank. His wand crush and sweep attack hit for 800k and as a ranged class there is no need to go near him, especially because the attacks are AoE ones. Melee classes position themselves on the opposite side of the tank as usual. The boss also has a Finger of Death ranged attack that hits similarly hard, but can be dodged. So everyone but the Scourge Warlock has an easy way of avoiding it.
The one thing making the boss predictable is the fact that he always prioritizes melee over ranged attacks and the aggro table. If he can hit something in front of him, he’ll always do it instead of using Finger of Death on a ranged target. So as long as the tank is alive, hugging the boss and out-aggroing any melee DPS, no one else will get hit. This is also why having melee pets can be rather convenient. In the solo videos of Castle Never you can see Blink Dogs or Young Yetis fully tanking the boss. That’s because as long as the target is in melee range, he never switches to the actual player, who has all the freedom in the world to do damage.
Special Attacks
Every so often, the boss will raise his arms and roar, initiating a randomly picked special mechanic. These include:
- Sphere of Annihilation interlude: A sphere you should already know from the run spawns, and the group again has to prevent Undead Adventurers to reach it. It’s a bit more difficult than the baby version before the second boss, but it should be no biggie. If the sphere gets charged, it’ll take away 80% of the HP of each group member.
- Rifts: Three rifts appear on the battlefield and can be entered and cleared just like those in the Foyer. As long as the rifts are open, Orcus gets an additional 80% damage resistance that can’t be mitigated. Most groups decide to pull through and live with the low damage, but it’s probably faster to let the DPS just close the rifts. The phase lasts 90 seconds.
- Two players are bonded, pulled towards each other and take significant damage on impact. This is the mechanic from the first boss and Servitors and can be countered by moving/dodging away from each other.
- Moving death spheres / poison balls: This is probably the only really challenging mechanic of the fight. Orcus can spawn up to three death spheres / poison balls that you already needed to avoid in the last section of the run. They are randomly bouncing around and kill on impact. Since this is the worst that can happen, you should always prepare for them to appear and start dodging and blocking whenever Orcus starts his animation.
- Nothing. No matter which outcome, you always take 80% of your HP as damage, but sometimes no extra mechanic is started.
Conclusion
There is no reason to die in the fight other than to the moving death spheres. Those can be annoying though, because they spawn at random locations and if they happen to surprise multiple players at once, the wipe is inevitable. Even after the nerf you probably still want to think about using Divine Protector as Paladin against the poison balls, because it’s exactly the type of “oh shit” situation the power was originally designed for.
If the tank loses aggro or dies, the group is dead most of the time, because the boss will soon switch targets and melt everything. Ranged DPS with dodges might be able to stall just enough time for the tank to resurrect and continue, but especially Scourges and Great Weapon Fighter are just fodder. GWFs can technically dodge attacks by using Mighty Leap, but that’s not a standard power for DPS and if you don’t use a third-party switcher, it takes to much time to slot it.
So as long as you have a potent tank or tank/DC combo, every group should be doing ok. Generally all powers that give immunity to the tank or suck up hits are helpful, because the boss is a hard, not a fast hitter. Steel Defense, Fox’s Cunning or Anointed Army are good examples. You can also use Break the Spirit or Ray of Enfeeblement to debuff Orcus’ damage and Astral Shield should be mandatory as well. Decent groups should be able to kill Orcus after his second special attack, he doesn’t have particularly much HP.